

Whenever the word draw comes to mind, we think about a highly complex piece of art we like, but we can start with easy things to draw. Therefore, an easy drawing is reasonably practical to pass the time and kill boredom. However, it keeps your thoughts busy and helps you focus on something worthwhile and original. Sometimes, whether you’re on a lengthy road trip or just killing time during a work break, all of us need to sketch something quick and straightforward.
In this article, we figure out easy things to draw. An easy but very pleasing drawing, unlike a preschooler or nursery student’s drawing.
Simple Geometric Forms like Squares, Triangles, and Rectangles
The easiest things to draw always start with a basic geometric shape. Follow these steps to create basic geometric shapes, including squares, triangles, and rectangles, with instructions:
Things to remember before starting your drawing
Keep in mind to draw your lines as straight as you can. Alternatively, you can lightly sketch the shape with a pencil and deepen the lines if you are happy with the proportions. By following these lessons, you can gradually improve your sketching abilities and produce stunning geometric forms.
Square:
- Make a perfectly straight vertical line first.
- Draw a second straight line parallel to the initial line, starting at the line’s leftmost terminal.
- A closed object with four equal sides is produced by joining the ends of the two straight lines with a further two straight lines.
Triangle:
- Draw a straight horizontal line to serve as the triangle’s base.
- Construct a diagonal line inclined upward and to the right from the base’s termination.
- Create an enclosed form with three sides by connecting the final terminus of the foundation to the diagonal line’s final terminus.
Rectangle:
- Make an even horizontal line first.
- Construct a vertical line that is straight downward, starting at one of the line’s ends.
- Draw a second straight vertical line straight downhill parallel to the first line from the opposite terminal of the horizontal line.
- Create a closed object with four sides with opposite sides equal in length by joining the ends of all the vertical lines by adding two straight lines.
Easy Things That Can Be Drawn Using Three Shapes
One of the easy things to draw are square, triangles, and rectangles drawing is:
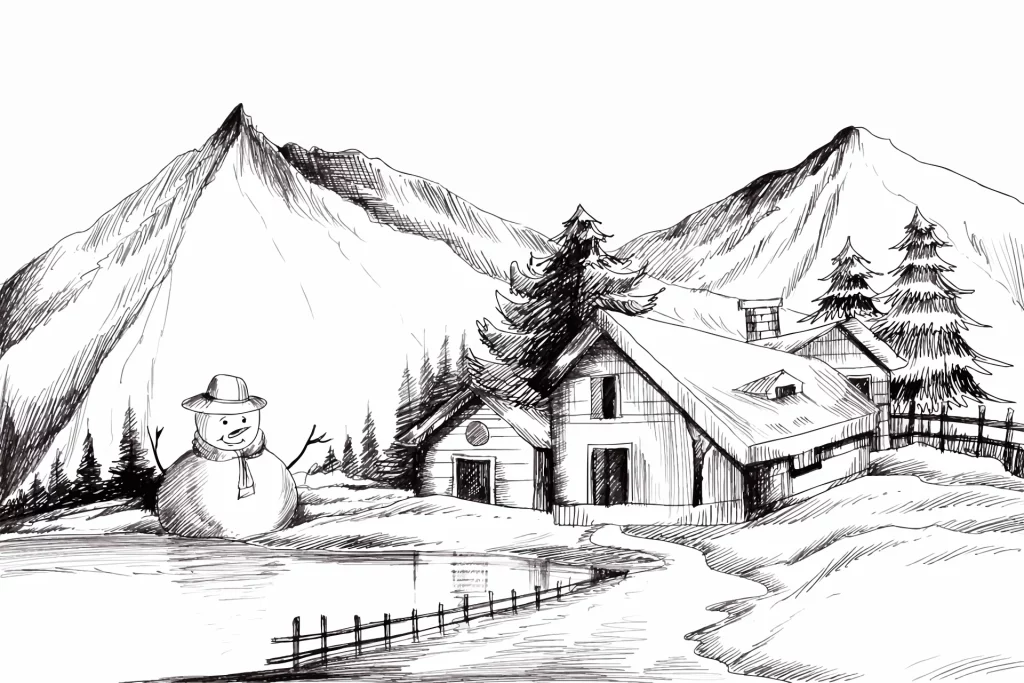
“Mountain Landscape” is a drawing.
You may use squares, triangles, and rectangles to make a lovely “mountain landscape” by following these steps. Enjoy the process of drawing, and let your imagination run wild!
Instructions
- Start by tracing a sizable rectangle close to the paper’s bottom centre. This will serve as the landscape’s foundation or ground.
- Draw a series of overlapping triangles with different sizes and angles to portray mountains above the ground. Depending on your desire, such triangles can be either tall and pointed or shorter and rounded.
- Using smaller triangles and rectangles adds details to the mountains, including peaks, cliffs, and slopes.
- For a house or cabin, draw a rectangle or square in the middle or toward the rear of the landscape.
- Include squares and rectangles in your home’s or cabin’s windows and doors.
- Create a tiny square or rectangle on the ground to symbolize a lake or pond.
- Using tiny squares and triangles, accentuate the environment with additional elements like trees, plants, and clouds.
- Feel free to use circles and other shapes to represent extra elements in the sky, such as the sun or moon.
- Remove any extra lines, then adjust the drawing as necessary.
A Basic Flower with Petals and a Stalk
What could be more accessible to draw than a basic flower with petals and a stalk? Here are step-by-step directions for illustrating a straightforward flower featuring petals and a stalk.
Things to Remember Before Drawing This:
Remember that drawing is to show your creativity; therefore, feel free to play around with the shape, form, and number of petals to make your unique flower. Enjoy drawing this lovely, simple flower!
Instructions
- Create a little oval shape towards the middle of your paper to begin. This will serve as the flower’s centre and is also referred to as “the flower’s head” and “receptacle.”
- Draw an upward-pointing, slightly curved line starting at the peak of the oval shape. This is going to be the flower’s stalk or stem.
- Let’s now add the petals. Create a little curve at the top left corner of the oval that curves downward until coming to an end towards the bottom left corner of the oval. The first petal is this one.
- To make the second petal, repeat the same procedure on the opposite side to create an oval shape. Assure symmetry between the two petals.
- Along the left and right sides of the oval shape, draw curves that progressively radiate outward to continue building petals. Aim for 5-8 petals overall; however, feel free to add a little or a lot based on your taste.
- Following the painting of all the petals, make a series of little strokes among the curves within the oval form to represent the feelings or other features of the flower’s center.
- Returning to the stalk, draw additional diagonal lines extending from the stalk and stem. These lines illustrate the leaves. Put one to three leaves on the opposite side of the stem, depending on the desired outcome.
- You may also draw a few squiggly lines or curves to depict veins on the leaves.
- The drawing should be darkened, and the lines should be refined.
A Face with a Mouth, Eyes, and a Smile
A smiley face is never a challenge, but we always mess up when we try to do it. So, here is a clear and firm instruction to draw this easy thing:
Instruction:
- A horizontal line above the middle of your page should be drawn first. This will serve as a visual cue.
- Down the horizontal line, equally spread out two oval shapes. The eyes will be these oval shapes. Depending on the final aesthetic you want, you may make them large or small.
- Sketch a smaller oval and a circle at the top of each eye, leaving a little white space to represent a shine or reflection. They are the students.
- Draw the peak of the grin as a slightly curving line just below the eyes. You may select the width or narrowness of the grin.
- Draw a curved line with downward and slightly upward ends to make the cheeks, extending the grin.
- A curved line that joins the smile’s two ends completes the mouth’s form.
- Draw a thin, curving line that follows the contour of the grin just above the lips to give the face depth and dimension. This line symbolizes the upper lip.
- To indicate the bottom lip, add a second curving line right below the mouth in the same manner as the grin.
- You may add other elements like brows, eyelashes, or cheek dimples to improve the emotion further.
- Adjust the drawing’s darkness as required, clean up the lines, and remove any extra guidelines.
A Branching Tree with a Trunk
One of the easy things to draw is a branching tree with a trunk.
Here are step-by-step directions with clear illustrations for how to create a branched tree with a trunk:
Things to remember
Remember that trees come in various sizes and shapes, so feel free to modify the dimensions and specifics. Don’t stress about perfection; a tree’s beauty rests in its inherent imperfections. Enjoy creating a gorgeous tree with branches and a truncated trunk.
Instruction:
- Starting in the middle of your page, draw a vertical straight line. This will serve as the tree’s primary trunk.
- Draw a few tiny, diagonal lines that branch out in various directions from the highest part of the trunk. These lines will represent the heavier branches.
- Draw extra diagonal lines to create additional thinner branches from the ends of each broader branch. Change the branches’ lengths and angles for a more natural appearance.
- The branching process can continue by taking more slender branches from the current ones. As many branches as you’d like can be added as long as a balanced and attractive distribution is maintained.
- Draw tiny curving lines using V-shapes to indicate the leaves on the ends of each of the branches. You may also move certain leaves nearer to the trunk to enhance depth.
- Add extra leaves and smaller curved or straight lines to the current branches to create larger foliage.
- To further improve the tree’s structure, you may draw more branches branching away from the main stem or bigger branches.
- Adjust the drawing’s darkness as required, clean up the lines, and remove any extra guidelines.
A Cone of Ice Cream or a Cupcake
A cone of ice cream or a cupcake is always easy to draw, but we can enhance our skills with proper direction.
Here are explicit directions with step-by-step illustrations for sketching an ice cream cone and a cupcake:
“Cone of Ice Cream” a Drawing.
Instruction
- Start by tracing a triangle upside-down in the middle of your page. The cone will look like this. The base of the triangle needs to be broader than the summit.
- Draw a little semi-circle, oval, or half-circle starting from the highest point of the triangle. This will represent the whipped cream scoop.
- Add brief, curving lines to simulate a texture or swirls on the ice cream scoop’s surface.
- To show the design or roughness of the cone, draw additional diagonal or small, curved lines inside the cone.
- To depict the waffle texture, you can optionally add a thin, curved line or many lines close to the centre of the cone.
- Adjust the drawing’s darkness as required, clean up the lines, and remove any extra guidelines.
Fig.: “Cupcake”
Instruction
- On your paper, begin by tracing a trapezoid shape close to the middle. The base of the cupcake will be this, which will be broader at the bottom and thinner at the top.
- Draw a curving, erratic form starting from the top of the trapezoid. This will stand in for the cupcake’s icing or frosting.
- Draw tiny, curving lines or swirls into the frosting to represent texture or ornamentation.
- Draw a sequence of brief, curving shapes or lines to indicate the cupcake lining or wrapper around the top border of the trapezoid.
- You can optionally draw tiny shapes or lines onto the icing to represent sprinkles and other decorations.
- Adjust the drawing’s darkness as required, clean up the lines, and remove any extra guidelines.
Things to Remember
Remember that there is room for interpretation and originality in these drawings. To make your ice cream cone or cupcake substantially more enticing, play with colors, embellishments, and other small touches. Have fun sketching!
A Home with Doors and Windows
A home with doors and windows always looks easy things to draw. But to do it in an artistic yet accessible way, try their instruction.

Things to remember
Remember that this is only basic house construction, so get creative by adding a roof, some landscaping, or extra architectural features. Enjoy creating this gorgeous house with doors and windows in your drawing!
Instruction
- Start by tracing a rectangle close to the paper’s centre. This will serve as the home’s primary framework, or “house frame.”
- Near the top of the home frame, draw a smaller rectangle. This is going to be the house’s upper floor or attic.
- Draw two equally spaced vertical lines to divide the house structure vertically into thirds. Doors and windows will be positioned along these lines as a suggestion.
- Draw a rectangle with the front door on the lowest third of the home frame. You may add extra elements like doorknobs or panels if you’d like.
- Draw rectangles with the windows on each side of the entrance door. Depending on your options, these windows can be either squares or rectangles.
- Draw smaller rectangles to accommodate the attic windows above the entrance door and windows. Align these rectangles against the home’s top level.
- Draw rectangles or squares over the other empty spots of the house frame to add additional windows to the structure. To provide visual interest, change the shapes and sizes.
- You can draw a little chimney on the opposite side of the roof. To build the form of the chimney, start by sketching a rectangle along the perimeter of the attic.
- Adjust the drawing’s darkness as required, clean up the lines, and remove any extra guidelines.
The Sky’s Clouds, Another One of the Easy Things To Draw
What can be more artistic than easy things to draw, like the sky’s clouds?
Here are step-by-step guidelines with explicit illustrations for sketching clouds in the sky:
Things to Remember:
Always remember that the beauty within clouds rests on their organic and constantly evolving forms; therefore, feel free to play around with various shapes and sizes, including shading strategies. Enjoy painting the clouds in the sky!
Instruction
- On your paper, begin by softly drawing a few rounded, irregular shapes. These will act as the foundational contours of your clouds. To make the composition appear natural, alter the forms’ sizes and locations.
- Add more curves and bumps to the original outlines to develop the cloud formations. Because clouds have rounder edges, the lines should be softer and wonky.
- To give the bigger cloud patterns depth and texture, insert smaller and overlapping cloud shapes inside them. Depending on your desired aesthetic, you may join these or keep them apart.
- Remove extra lines in the initial designs to tidy up the cloud formations. Ensure that the margins are clean and well-defined.
- Slightly darken the edges and bottoms of every cloud with brief, horizontal strokes to give them depth and character. This shade needs to be darker than the surrounding clouds.
- To produce highlights and the appearance of light bouncing off the clouds’ surfaces, leave some of their surfaces unpainted.
- Step back and evaluate the sketching of your clouds’ general structure. If necessary, increase the shading or detail and then tweak any places needing additional clarification.
- Once you are happy with the appearance of the clouds, you may add other things to the picture, such as the sun and birds, among other things, to improve the feel of the sky as a whole.
A Moon or a Star
A moon or a star is an easy things to draw that always clicks in our minds. But when we try to draw, it doesn’t seem easy. So, here are step-by-step instructions for sketching a moon and a star, both with explicit illustrations:
Points to remember:
Remember that the stars and the moon have distinctive qualities, so feel free to give them your original spin to make things stand out. Have fun creating your artwork of a lovely moon or star!
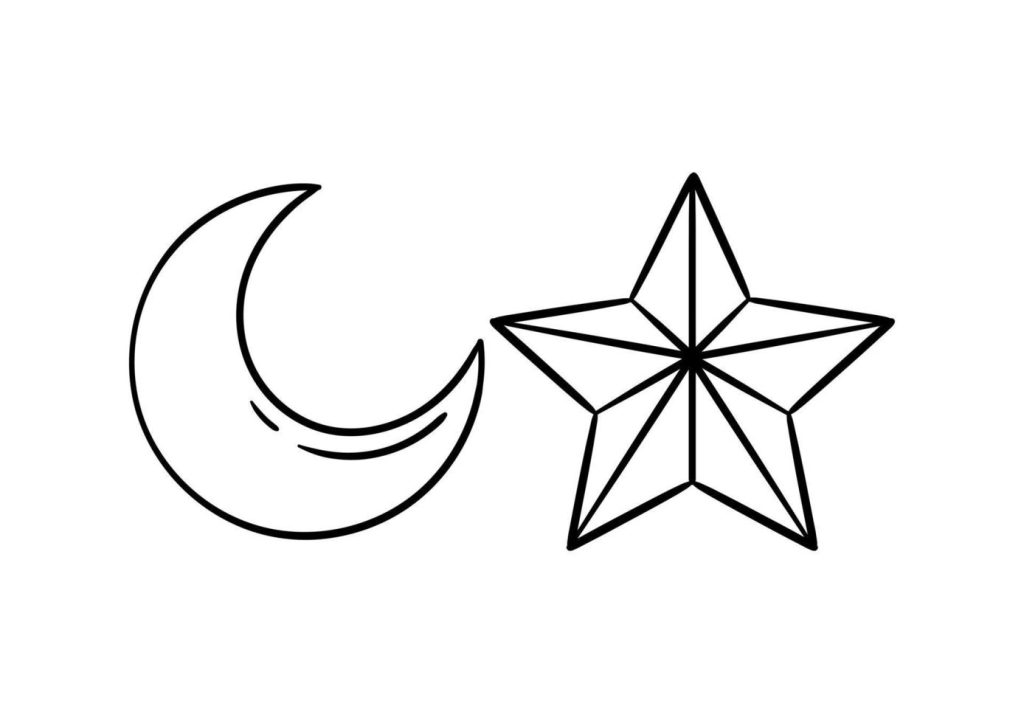
“Moon” is a drawing.
Instruction
Begin by drawing a sizable circle close to the paper’s center. The moon will be shaped like this.
Draw a smaller, curving line close to the right edge of the circle. This will outline the luminous region of the moon.
Draw a few curving lines or arcs along the moon’s left side to show the darker or shadowy area. It will appear three-dimensional as a result.
To give extra depth and contrast, you can darken the shaded area of the moon softly.
Adjust the drawing’s darkness as required, clean up the lines, and remove any extra guidelines.
Figure: “Star”
Instructions.
- To begin, draw a tiny, equilateral triangle in the middle of your page. The star will have this shape.
- Construct a diagonal line rising upward from the triangle’s top corner. To create three lines that intersect at a point, repeat this process on the remaining two ends of the triangle.
- Draw a diagonal downward line starting from the triangle’s bottom corner. To create three lines that meet at a point, repeat this process on one of the two ends of the triangle.
- The star form is completed by joining the ends of the diagonal lines with short, curved lines.
- You have the choice to include extra detail in the star by including tiny lines as well as curves inside each triangle.
- Adjust the drawing’s darkness as required, clean up the lines, and remove any extra guidelines.
Conclusion:
Finally, by following explicit directions, it is possible to draw simple and identifiable objects like geometric forms, buildings, flowers, faces, trees, ice cream cones, cupcakes, clouds, moons, and stars. Anyone can produce an easy-to-make yet aesthetically beautiful artwork by dividing the sketching process into manageable parts and paying attention to details. Remember to enjoy the adventure of bringing your vision to life on paper, experiment with numerous versions, and embrace your creativity. Happy sketching!